Thursday 29 June 2017

True Bias Sutton tee in silk

This is the second Sutton top I've made.  Here is the first.

Still a size 2, and this time I shortened it 2 cm.  Er, I definitely shortened the front, anyway, but more on that later.  As I mentioned on version 1, the size chart would have me make a size 4 and I sized down because I don't like things too oversized.

The fabric is a silk charmeuse remnant from The Fabric Store in Auckland.  I immediately know I'd use it for this pattern.  I thought the combination would be low key and just perfect and I was right.  I love it and I've been wearing it a lot.


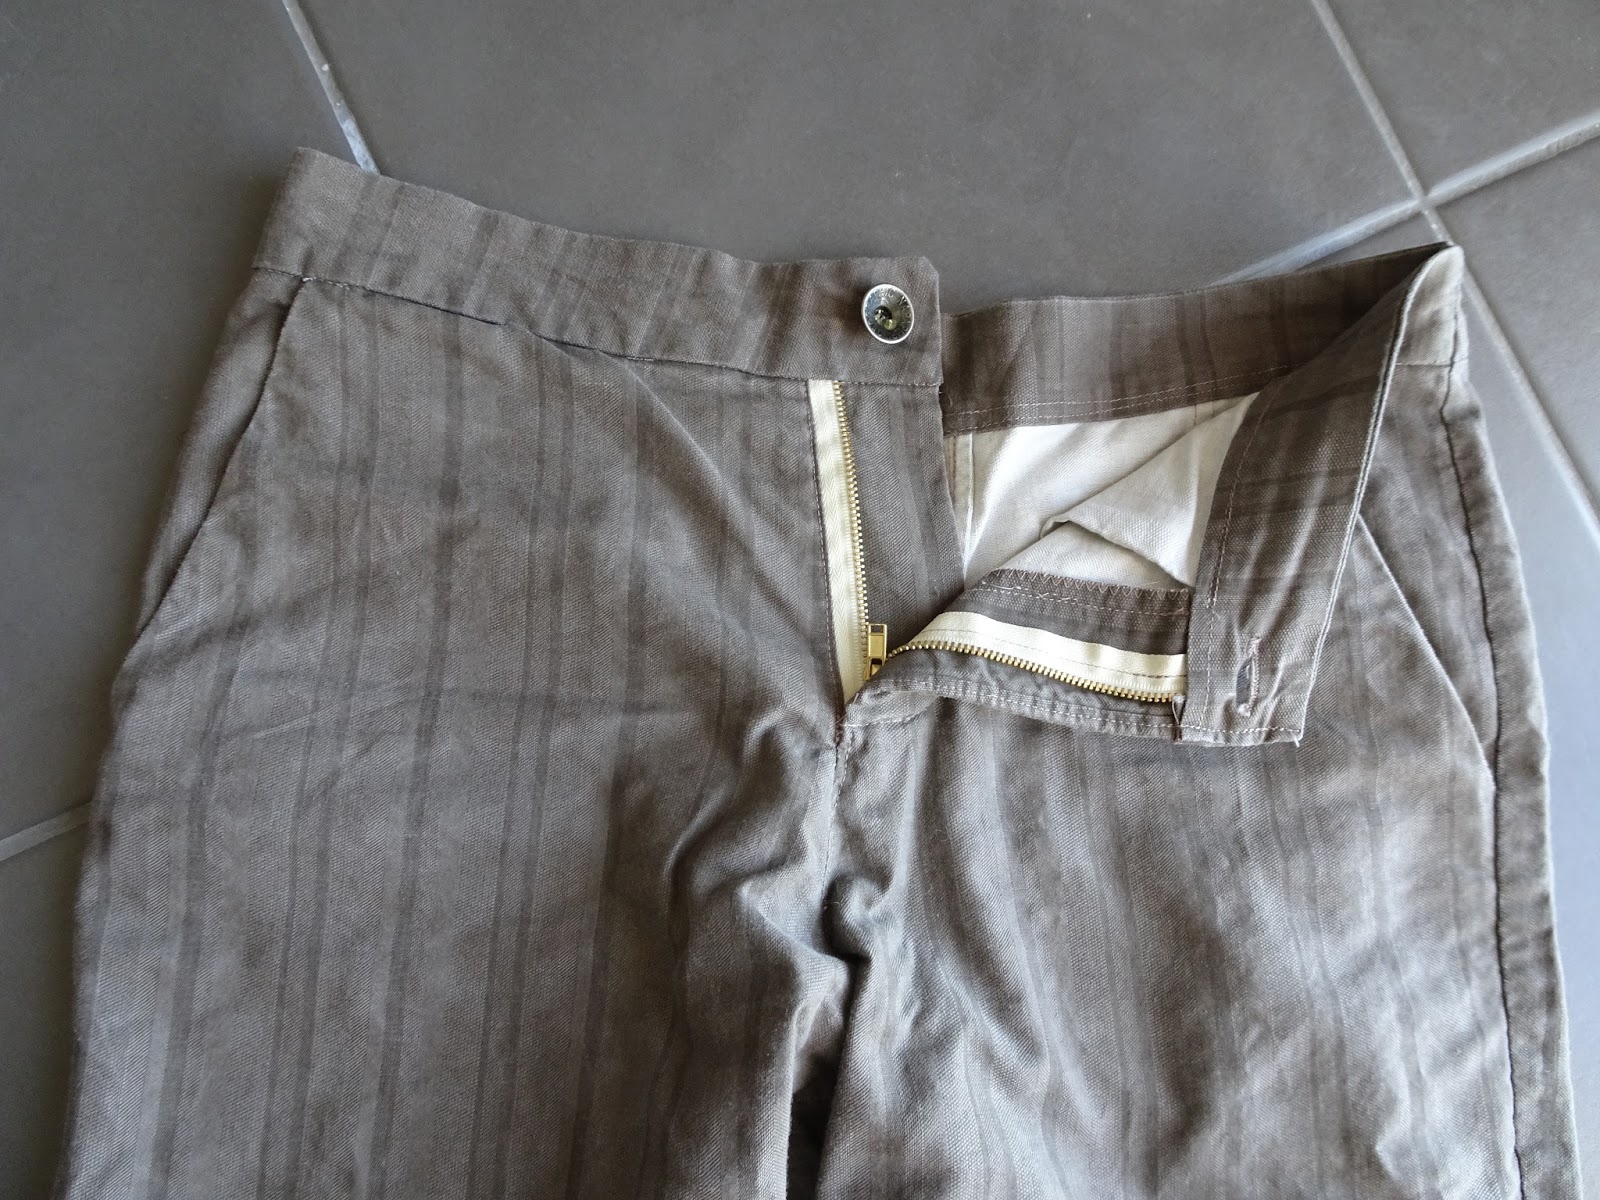
(These pants are my very first Sewaholic Thurlow trousers.  They are now more like boyfriend jeans because I have lost weight.)


This pattern is really top notch and I enjoyed it the second time around as much as the first.  It's a pain to finish the side seams on a silk top without a serger - I used a zig zag which creates kind of a mess, but I think it is stable, at least and won't fray.  And I can keep pining for a serger! The rest of the seams are done as french seams and I took my time and did a lot of ironing for once.

So I got around to the bottoms and noticed with some suspicion that all my dots on the back were about 2 cm lower than on the front, so I think somehow I didn't shorten it properly.  To make up for this I used the front (shorter) dots as the main ones and I ended up folding the back hem up one time extra.  The silk didn't like this and it is a bit messy on the inside, but the outside looks fine, and it makes a heavier hem which is nice. 

Sunday 25 June 2017

Wanted tee by Vanessa Pouzet

I think tshirts are the most satisfying thing I sew.  I knew I'm supposed to love getting deep into major projects.  But the truth is that tshirts are the thing I wear, and when I can wear me-made ones I prefer them every time.  Other, more complicated makes, usually end up being experimental.  I like the challenge but I don't need the item in my wardrobe.  If the experiment doesn't totally succeed then I'm far too likely to give it away.

Anyway that's all to say I always need more tshirt patterns and I drooled over this amazing Vanessa Pouzet top when it came out.  I like her designs but most of them are not very practical for me and I also get sad at the very idea of trying to read french patterns.  However a tshirt is straightforward, so although the pattern is in French, you don't need more than the diagrams.

This first version is a scrap from The Fabric Store which is purple on one side and black rib on the other. It's a merino-poly blend and is very warm and has good recovery.  I was going to do black and in my head that couldn't be changed...which is why the neckband ended up black.  It makes it hard to match things in my wardrobe as purple/black aren't a combo that I wear much.  But it does layer under scrubs very nicely.  Unfortunately I still wish I had made it black.

I cut a size 36, although I also traced 38 as a backup.  My measure: 33-27-37, and I'm 5'4".  I'm starting to bounce back from my habit of cutting things too big which was going on all last year. This rebound likely will eventually lead to cutting things too small.  We shall see. 


I thought that maybe the neck would be too low in the front.
In fact it's more like it's a touch wide and carries over into my armpits.  This also makes it slightly less bra friendly.

So I took out 2 cm of the centre front, including of the neck band, and then re-added the same amount as a strip down the side.  I considered changing the armscye as well but left it for now.  I am still really nervous about making changes to patterns!  I might be better off using fewer patterns and learning how to modify them better.

Plus we made pancakes on the beach...


I was surprised how much the front neck gathers when it's just sitting around, but when I wear it, it looks fine.  I think this was a small fix that I prefer - I can barely tell the difference except it doesn't feel like the shirt is sliding down into my armpits.  The second fabric is a very lightweight cotton/cashmere/something else blend and is glorious.  Unfortunately, I was sewing this when I had a friend over and I didn't pay painstaking attention to the neckband, which is necessary.  Therefore, it's not got very nice corners.  Please don't stare.  I managed to somehow salvage the mess and I'm happy.

The first of these two tops was the beginning of about 2 weeks tshirt sewing like a sweatshop, and the second one was the end of the two weeks when I had already had a knit-free few days and just wanted to finish one last tshirt!  

Sunday 18 June 2017

Cali Faye Hampshire pants

I planned to make these for ages and in fact was obsessing over this pattern and had certain fabrics already chosen.  Naturally all my projects fell by the wayside with my move from the States, and the fabrics were also put away.  But I didn't manage to pack any pants for New Zealand so I started over with new fabric and my new Pfaff Passport 2.0 and got working.

I had even made a muslin of these from a bedsheet which goes to show that muslins do not help me as I can't translate from the muslin to reality.  I just don't get it!  The muslin was too big but that didn't foreshadow anything to me - I just thought I will maybe take in the waist a bit in the real version!  

It started out as the second project with the new machine (Pfaff Passport 2.0) and so far I'm really really happy with the machine.  It is possible that once you have an IDT you can't go back.  But I'll keep working and eventually review when I have more thoughts.

I got this super cheap fabric at David's Emporium in downtown Hamilton.  They are kind of the local crafty junk store and have a lot of unlabeled and very cheap fabrics.  I didn't burn test this but I have been ironing it really hot and it never melted so it's probably 100% cotton.  It was $6 per meter!

I cut a size S based on my measurements, despite that muslin, thinking that I didn't want to go too small as these pants are supposed to skim right over the hips.

I really enjoyed the instructions.  They have great details for finishing everything -- you are made to french seam the crotch and then topstitch it prior to sewing the back and the front together, which looks really good, although it does mean you can't adjust later.  I totally took this technique and used it on my Chataigne shorts too and I will probably keep doing it, because I love having the crotch curve finished nicely.

Everything went together great although I skipped the triangles you put over the pocket because I folded the pocket pretty side together.  If you want your pretty fabric on the inside of your pants, then you need this triangle on the outside as a kind of pocket facing.  It took me awhile to reason this all out and then I just ditched them.

Also, after my terrible Safran experience the fly was a joy.  I did baste it shut badly and then had to undo a bit but overall it was so straightforward and I think it produced the best fly result, possibly as good as or better than the Sewaholic Thurlow fly.  Not my fly seam though, that went a bit crazy.  Oh well...no one will be staring at my fly, I hope.

In the end they are big!  Muslin was right!  I thought at first about taking in the darts, taking in the waistband, etc, but then I decided these will be my baggy pants.  While under that ridiculous impression I went for a crazy jeans button that was a spare from something.  The back had pointy prongs that needed to go into the front.  I finally used like a hammer and then some epoxy glue to hold the prongs in...but it does look professional (from a distance) and it's really stable...

These are the pre- pictures, and they may look nice but it's actually because of the scenery and having an unusually competent photographer. 


Can you tell these pants are FALLING OFF?


So I wore them for like half a day and faced reality.  These pants were not going to be my baggy pants in this state.  They needed serious surgery and it was embarrassing being out in public in them.  2 centimeters removed out of each side seam all the way down.  It took me ages to get around to doing this but it was a super easy fix!  And like magic, they now fit just the way they were supposed to - just a tiny bit baggy, loose, comfy...total save.  I think they are still not the most flattering, but they are no longer in danger of falling off.


My measurements are waist 27, hips 37, I'm 5'4" tall and didn't adjust the length and they are exactly the right length on me.  And I am going to make the XXS next in a stretch fabric to see if that fits better.  Even with a total of 4 cm removed they are very baggy.


Thursday 15 June 2017

Papercut Anima pants success, plus bonus upcycled shorts

I have attempted Anima pants a few times.
It's hard to tell what size I was using - probably XS.  They were never as flattering as on everyone else...and I had issues with the waistband elastic and with the finish on my first pair, and with the length on my second pair.

Not to say I dislike my amazing upcycled Anima pants but as I might have mentioned, they definitely won't make it out of my house. Ever. 

I had to trace the pattern anew this time so I started fresh with the XXS.  I shortened it about 2 inches at the bottom, removed the pockets and fly, and angled out 1 cm from the front waistband, tapering to nothing at the side front.

The fabric is a nice, rather light merino mix from the Fabric Store.  It's got terry loops on the back and I made a Renfrew with it too.

Finally, success!  The Anima are an easy pattern and it only took me, um, 4 tries to be really happy with it!


So while I was at it I had a massive skirt originally by Metalicus, which I upcycled into a Plantain.  I had just enough fabric left - plus the great RTW waistband - to make some Anima shorts.  Everything the same - I used the shorts length and attached my ready-made waistband!  They are a bit higher waisted because of this but I'm super pleased - although totally useless in cold winter I always need this kind of shorts in summer for sports/sleep/lounging so they will be put to use.